So you’ve downloaded the App and setup your business account, well done! Now it’s time for the fun part – creating your first ever FLYCKET.
The good news is that this whole process takes about 90 seconds so you can begin promoting your business and seeing immediate results very soon.
From the business side of your account hit the centre menu button at the bottom of the screen, that’s the one with the Flycket logo in it. This is your business wallet and where you can see all of your current and expired Flyckets and also where you create new ones.
Hit the circled “+” sign to open up the new Flycket template.
**Tip – on all pages of the App there are “?”s. Tap these for instructions on how the functionality works.
Now start to fill in the different fields of the Flycket.

In the example below you can see how your creativity can be unleashed. There are literally no restrictions on the type, style or content of how you choose to do your marketing.
In practice you will probably already have a marketing strategy so perhaps begin by translate your existing messages into the Flycket format.
Once you’ve done that, or if you have felt restricted with what you have been able to do previously, then why not try some new marketing ideas and create the Flyckets for the marketing you always wanted.
**Tip – the hero image is really important to the visual appearance of the Flycket. The screenshots below are from the Flycket creation process and you can see how the finished product will look from the final image, that hero image taking centre stage.

If you need explanations for any of the fields then hit that “?” for the guide.
[Offer title] this is the headline for the Flycket and as you build the Flycket you can scroll through the screen to see how the final product will look. The title is a big part of the Flycket so make it simple but catchy.
[Detail] this is the actual proposition you are making, it’s where you go into detail about what you are offering and any conditions that come with it. The text you enter here appears on the flip side of the Flycket so it can we quite long because it’s not on the front side of the Flycket.
[Category] there is a dropdown menu here, just select the most relevant category that applies to this Flycket you are creating.
[Expires] when do you want this offer to end? This is a really cool feature that sets the countdown clock, it creates excitement and urgency for customers to use the Flycket, it also protects you with an end date and time for the offer.
[Campaign limit] how many times do you want your customer base to use this offer in total? Example if you were inviting people for a half price haircut, how many half price haircuts are you prepared to do. If your marketing works well 100’s of people might take and share this Flycket. Do you really want all of them demanding haircuts with the discount or would you rather limit your exposure as a business. This sets a live counter on the Flycket that anyone who takes it can see.
[Personal limit] how many times do want to allow a single customer to use this Flycket? When a customer uses a Flycket it will be punched (with your PIN code) by a member of your team. If you have a personal limit of 1 then that customer can’t come back for the same deal again. If it’s 2 then they can use it twice and so on. Again this limits your exposure to people using your offers.
[Delay (mins)] to avoid customers who are already at your business taking advantage of an offer to get them there, you can set a time delay that has to pass between someone taking the Flycket into their customer wallet and them being able to use it. A great example is a nightclub queue. If you market your club all day and put a delay of 4 hours on the Flycket then people who have come to your club because of the Flycket can get free entry. Anyone in the queue who was coming to your club anyway can’t now take a Flycket and use because they would have to wait 4 hours before it is valid for them and instead they have to pay the entry fee. Avoid discounting at the point of sale and make sure you get the benefit of your marketing rather then giving stuff away for no reason.
[Venues] if you have multiple venues, maybe you are a chain of cafes or hair salons, then for each new Flycket you can choose which of your venues it applies to. The venues it is valid for are listed on the flip side of the Flycket along with all venues details, a google map location and directions to get there so your customers know where to go.

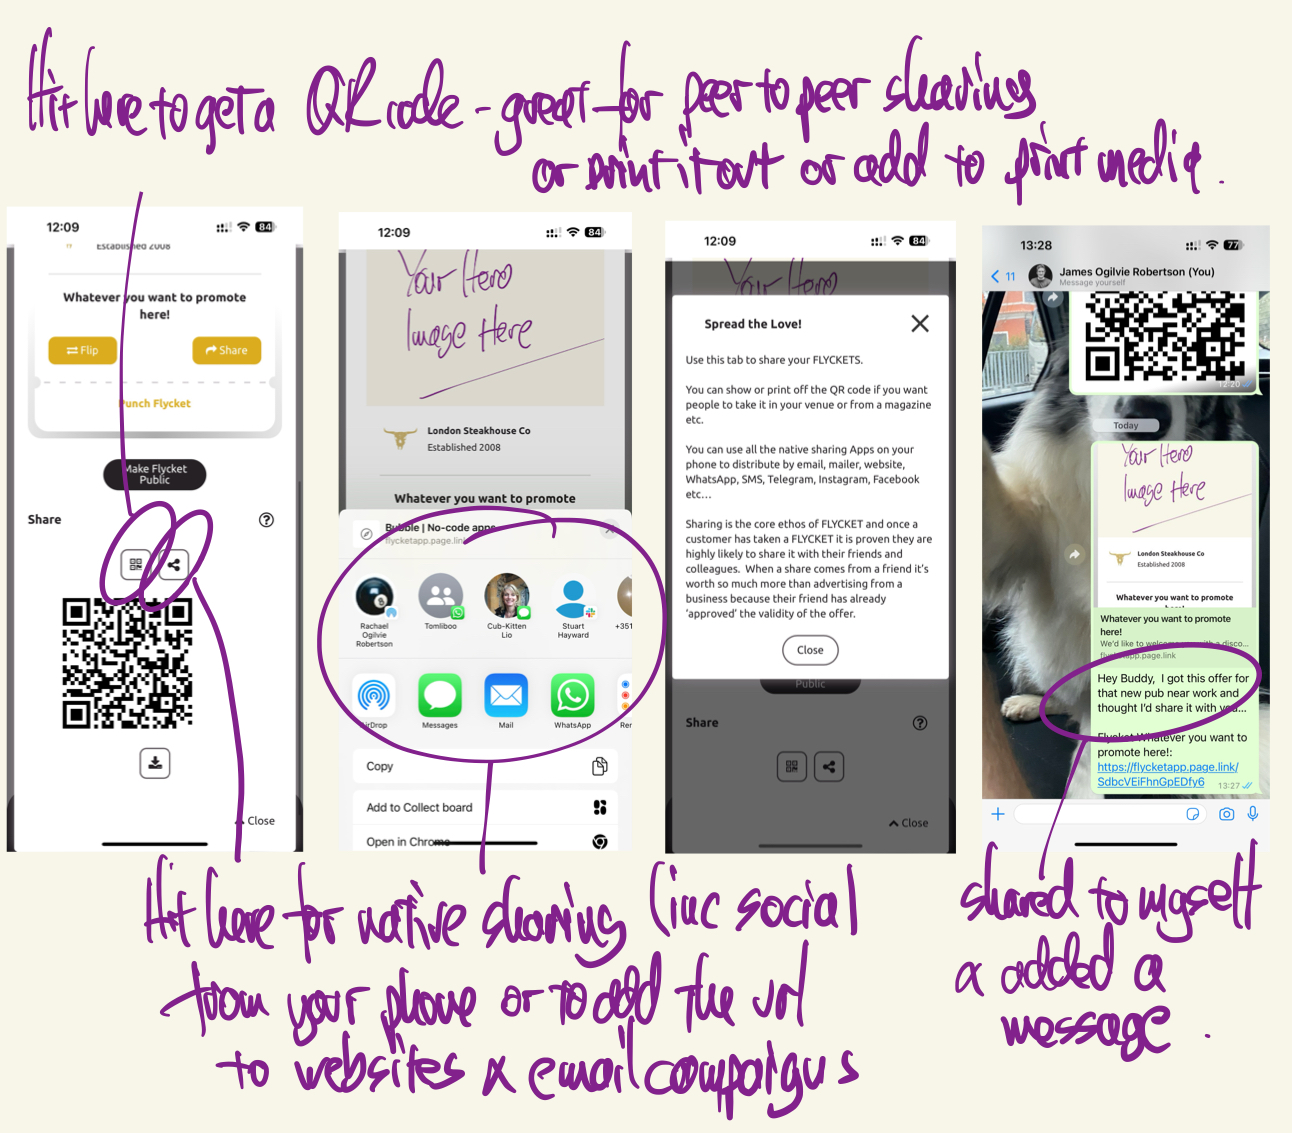
Ok so the Flycket is created, published and now you’re ready to start spreading the love…
Tap to get a QR code if you want to print this Flycket onto menus or give it to that magazine you have paid to advertise in.
**Tip – once your customers have taken this Flycket they have all the same sharing options as you, for them sharing by QR code from their phone screen to their friend who is next to them is a super fast and convenient way for them of sharing your marketing.
Hit the share button to get all the usual ways to share things from your phone, this includes all the social media you are on, SMS, WhatsApp, email, airdrop and so on, even just copy the url for the Flycket so you can embed it in an email campaign or your website. (Note: I have an iPhone but the same options are available on your android device as well).
In the final screen shot above you can see how I sent a WhatsApp to myself. Flycket automatically copies the front side of the Flycket into the WhatsApp for you but you can also add a message. This type of sharing is super powerful because it’s clear the Flycket is from a trusted friend with a relevant note to you explaining why they think you might like it.
SUMMARY
That’s pretty much it – there is no limit to the number of Flyckets you can create and share so you can try a load of whacky ideas and see what tickles people’s fancy.
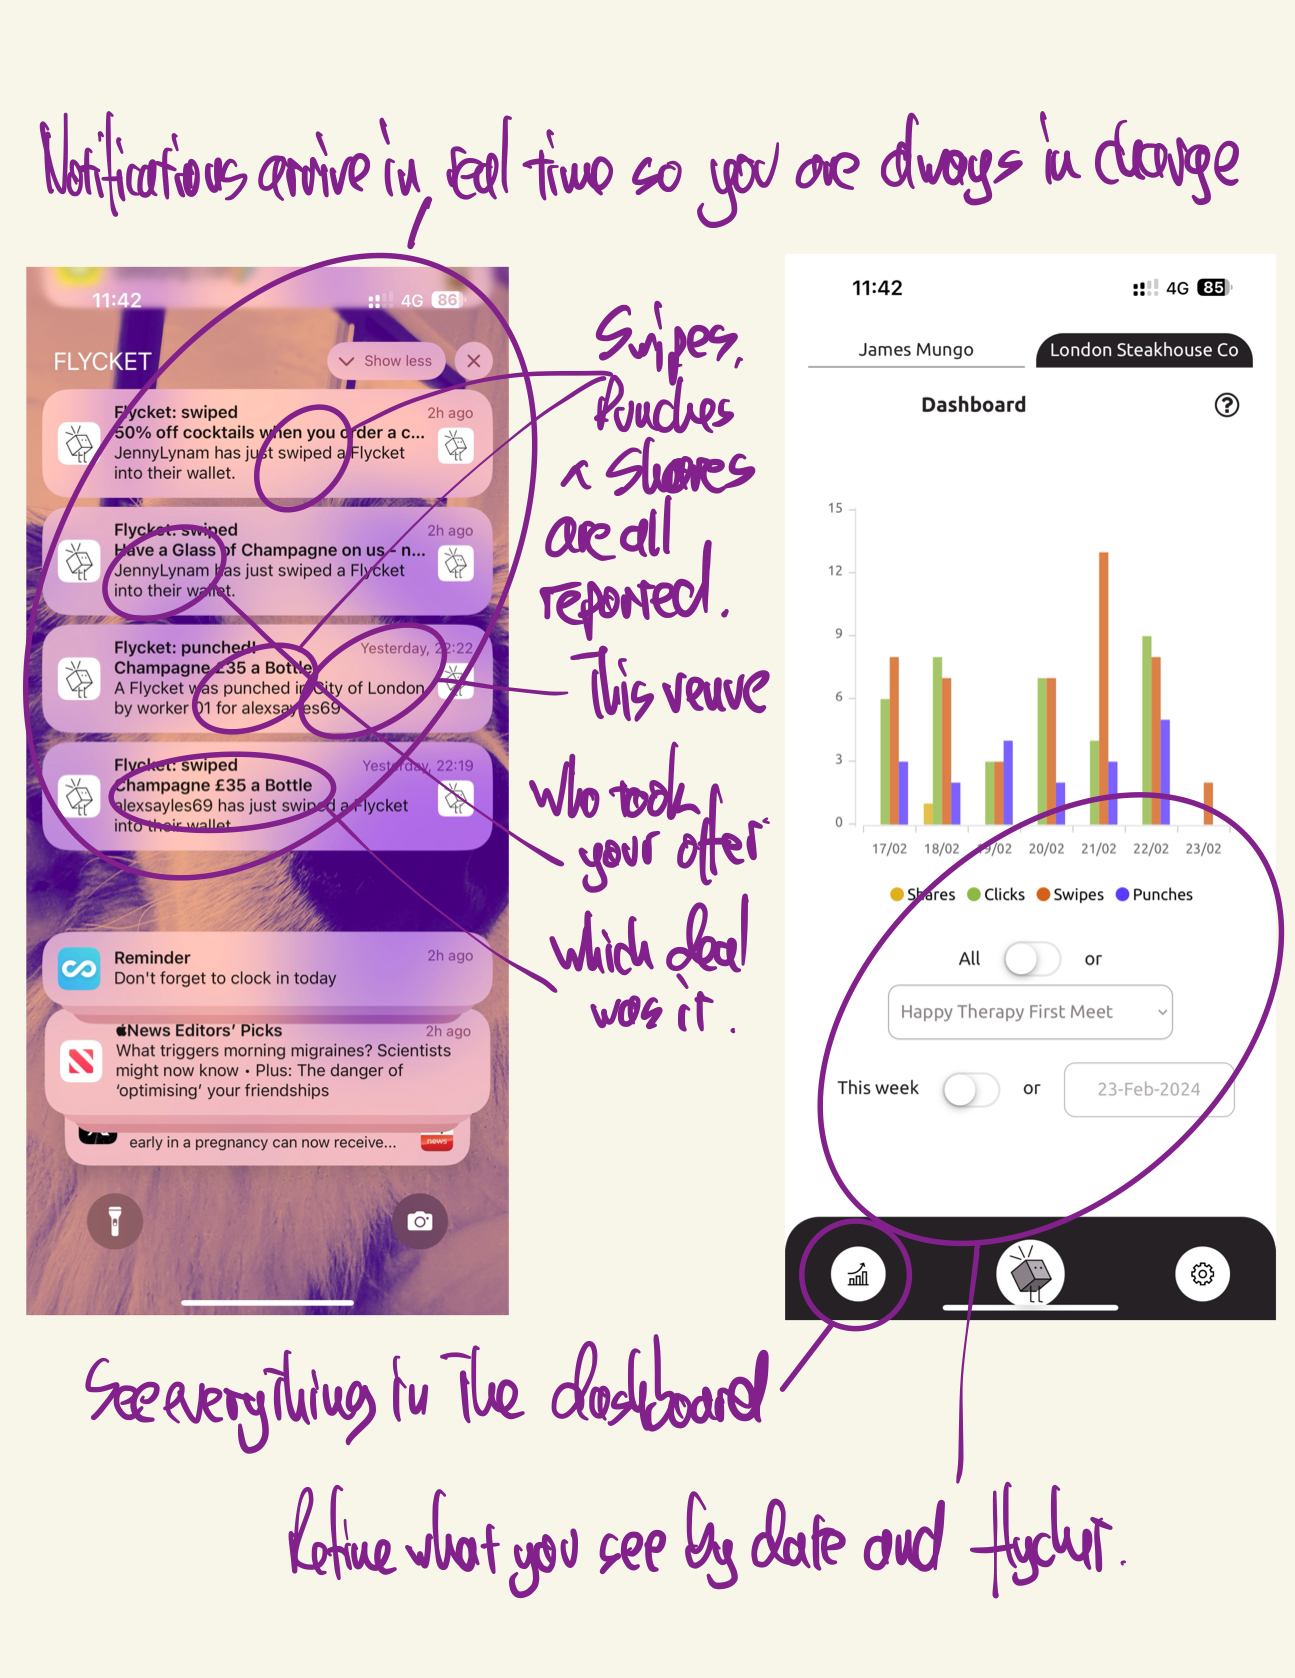
As soon as you share a Flycket and someone takes it you’ll start to see the notifications flying in on your phone and appearing in the dashboard on your App …


https://myteana.ru/forums/index.php?autocom=gallery&req=si&img=6609